Bantu knots, also known as Zulu or Nubian knots, chiney bumps, pepper seeds, or hair nubbins, is a traditional African hairstyle, made by sectioning your hair into triangles, diamonds, or squares and coiling those sections into knots.
What you will need:
- Sulfate-free shampoo and conditioner
- Towel
- Spray bottle
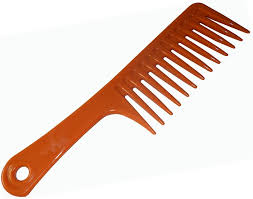
- Wide-toothed comb/Detangling brush
- Tail comb
- Butterfly clips/Snag-free ponytail holders
- Water-based moisturizer
- Twisting gel/cream
- Bobby pins (optional)
Steps:
- For best results, start with damp hair that has been recently shampooed and conditioned and towel-dried.
- Spritz hair with water using a spray bottle.
- Use your fingers or a tail comb to divide hair into about 6 to 9 sections, depending on the thickness of the hair.
- Separate the sections using butterfly clips or snag-free ponytail holders.
- Starting at the back of the head, loosen one section of hair (one on either edge of the nape is usually best). If the section feels dry, spritz it with some water.
- Apply your favourite water-based moisturizer to the section, paying extra attention to the ends of the hair.
- Use your fingers/wide-toothed comb/detangling brush to detangle the section of hair.
- Apply your favourite twisting cream or gel to the section to the moisturized, detangled section.
- Separate with your fingers or part a piece of the section with your tail comb into your desired shape (starting from the edge of the nape makes it easier), keeping in mind that the bigger the piece the bigger the size of your Bantu knot, and clip the rest of the section to the side.
- Bend the strand close to its base and pinch the bump created between the thumb and pointer of your left hand, and use your right hand to wind the length of the strand around the bump at the base to form a coil.
- Keep winding the length of the strand around the coil with your right hand, gradually winding closer and closer to your head with each round, until all of the strand has been completely wound up, to form a Bantu knot.
- If your hair is curly, and your knot is coiled tightly enough, the ends will likely stay coiled under the knot; if your hair is looser, then you may need to use a bobby pin to hold the knot in place.
- Unclip the remainder of the section, and repeat Steps 9-12 until the section is completely knotted.
- Move on to the next section of hair, and repeat Steps 5-12 until all of the sections are knotted.
***You can also create Bantu knots from two-strand twists: once your two-strand twists are completed, follow steps 10-14 above.***

To keep your Bantu knots neat, wear a satin bonnet or tie your head with a satin/silk headscarf when you go to sleep.